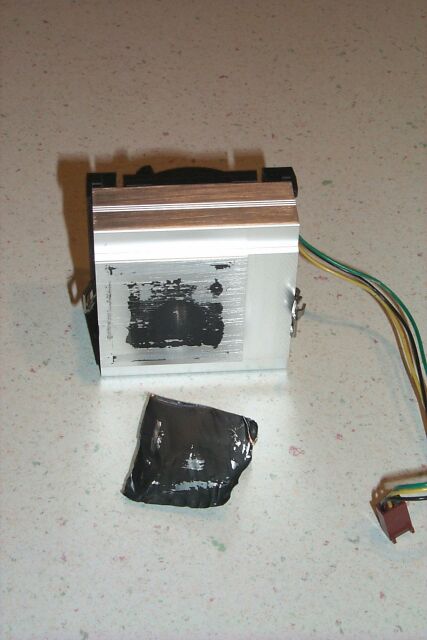
| 5) Foil-backed thermal tape square removed... |
Click on pic to enlarge |
Start the cleaning process by peeling the thermal transfer tape square off the bottom of the heatsink block. The square is basically a piece of metal foil that's been coated on both sides with a dark gray thermal adhesive substance. Some of this will remain adhered to the heatsink, and needs to be cleaned off. I wiped off as much as I could with a dry paper towel, and then cleaned off the remaining residue with nail polish remover (basically acetone). That seemed to do the job nicely.
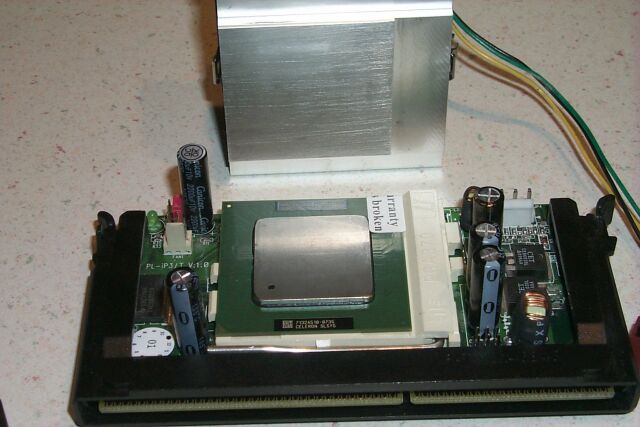
| 6) Heatsink and CPU both cleaned up & ready to proceed: |
Click on pic to enlarge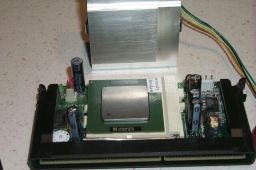 |
The same basic clean-up procedure is applied to the square silver-colored heat slug on top of the CPU chip. After wiping away most of the tape residue (there wasn't much, in my case) with a paper towel, a bit of acetone finished the job.
As you can see in the photo, both surfaces are nice and clean, and we're ready to move on to the application of the thermal paste.
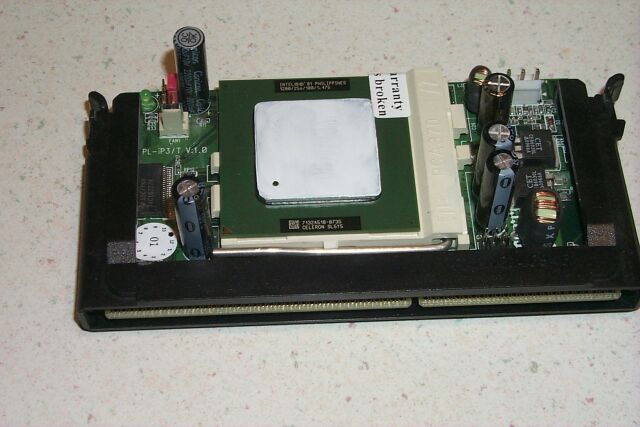
| 7) Apply a thin, even coating of thermal paste to the CPU: |
Click on pic to enlarge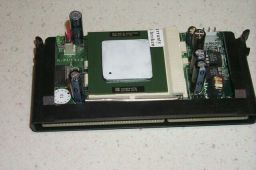 |
Now it's time to apply a thin coating of thermal paste to the top of the CPU heat slug square. You can get a tube of this stuff for a couple of bucks at any Radio Shack or decent computer store. For the fanatic, there's a special product with particularly high thermal transfer efficiency called "Arctic Silver", but it's probably overkill unless you're big-time into overclocking.
I just put a small dab on the tip of my index finger, and spread it around the heat slug surface as evenly as possible. You DON'T NEED MUCH! The function of this paste is to insure intimate, complete contact between the two surfaces, so that the heat of the CPU transfers into the heatsink block and is dissipated by the action of the fan. Too much will actually impede optimum heat transfer.
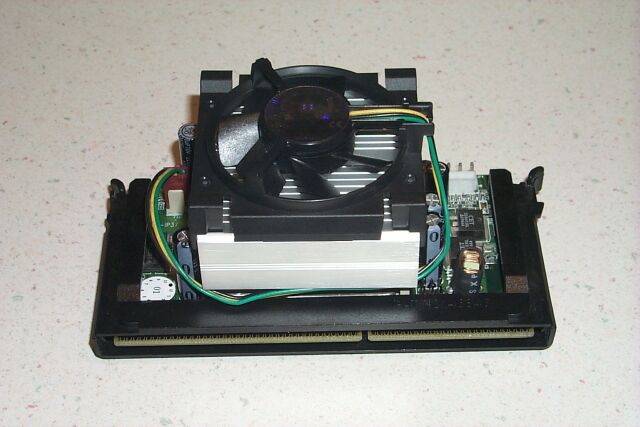
| 8) Back together and ready for "cool runnings"! |
Click on pic to enlarge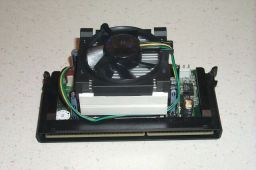 |
Once the paste is properly applied, it's just a simple matter of placing the heatsink/fan assembly back on the CPU and refastening the retaining clip on both sides. Reattach the clip without the slot first, and then use the screwdriver in the slotted clip to push it back down into position. It should snap into place over the plastic tab on the side of the CPU holder on the PowerLeap adapter.
Make sure that you don't re-assemble the unit backwards. The recessed "step" cut into the bottom of the heatsink aligns with the exposed strip of plastic on the CPU holder (on the right side in the above photos).
That should do the trick. Reinstall the iP3/T in your PC and power up. Lord willin' and the creek don't rise, she'll come up runnin' and stay that way!
 |
Done here? Check out Duh Voodoo Man's Home Page... |