| 1) Find side with slotted tab on heatsink clip: |
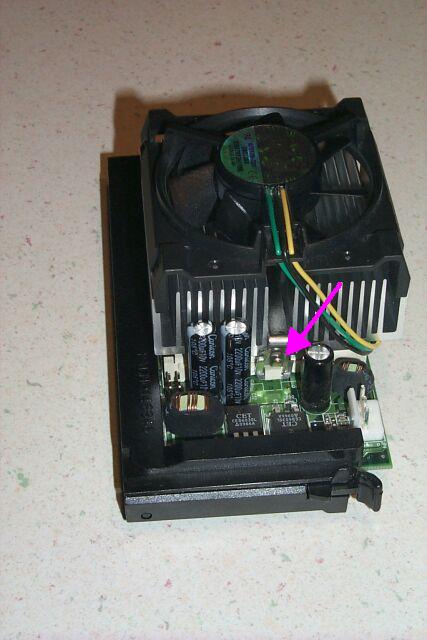 |
Unfortunately, several PL-iP3/T owners have reported problems getting the unit to boot up and run stably, apparently due to improper installation of the heatsink/fan onto the CPU/adapter assembly. PowerLeap assures us that this problem has been addressed as of 12/20, with all future units being assembled with thermal paste rather than the trouble-prone tape. And I'm told that they will gladly replace a problem unit, if you don't want to fool around with this repair procedure.
For most users who have encountered this problem, the issue has been poor alignment of the heat transfer tape square (affixed to the bottom of the heatsink block) with the top of the processor itself. Fortunately, this is easy to fix--but be aware that you proceed at your own risk. The first step in repairing an iP3/T with this problem is to remove it from your PC and locate the clip that holds the heatsink/fan assembly to the adapter. If you have the Intel fan, look for the slotted clip. If you have the PowerLeap fan, one side should have a "thumb-clip".
| 2) Now, gently pop that puppy loose... |
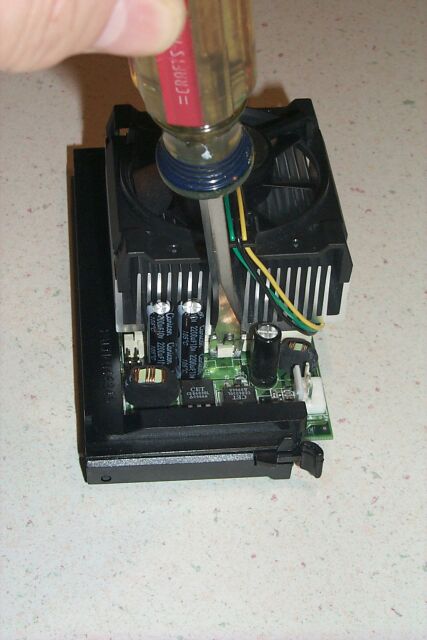 |
To loosen the slotted clip, insert the blade of a medium-sized screwdriver in the slot on the clip. Push gently downward while simultaneously prying the clip AWAY from the heatsink. It should pop loose fairly easily.
While this is not difficult, be sure to do it slowly and carefully, and don't exert too much downward force. If the screwdriver slips and jams into the adapter, the damage could be considerable.
Keep in mind that the unit in the photo has the Intel heatsink/fan. Owners who have the PowerLeap HS/fan have it easier, because the "thumb-clip" can be pushed down and toward the heatsink to release the clip, without need of a screwdriver.
| 3) Voila! Clip loose and ready to proceed... |
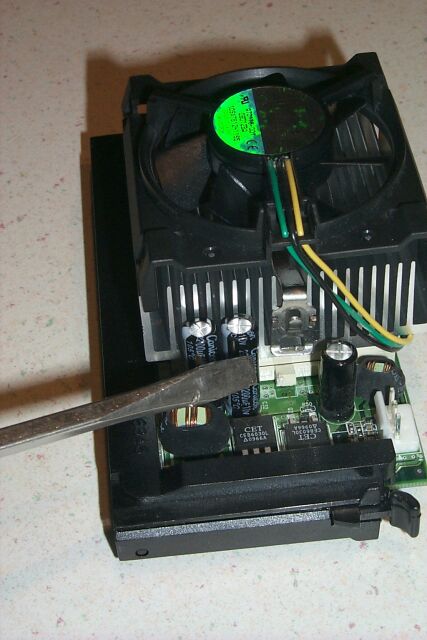 |
Once the clip releases, it will pop upward. Now, you can reach around to the opposite side, and remove the other end of the clip from the retaining tab on the adapter. The heatsink/fan assembly is then ready to be lifted off the adapter. It will probably still be "stuck", due to the thermal tape square between the bottom of the heatsink block and the top of the CPU heat slug. Just gently wiggle the heatsink and lift upward firmly. It should pop right off.
| 4) Heatsink/fan detached from the adapter: |
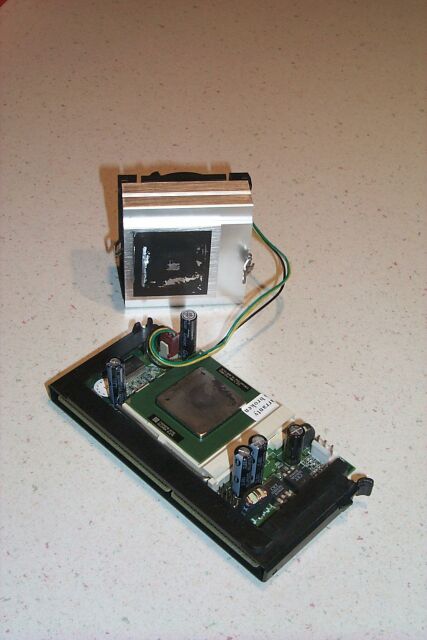 |
Once the heatsink assembly is removed, the fan lead will still be attached to the adapter. You may want to disconnect it for convenience, but it's not strictly necessary. Note that the "warranty void if broken" seal is NOT affected by removing the heatsink. It runs from the adapter across the top of the CPU.
With the two pieces separated, the square of thermal transfer tape on the bottom of the heatsink block is clearly evident. You may also have some residue of the dark gray thermal adhesive sticking to the top of the CPU thermal slug (the raised, silver-colored square, about 1.25" x 1.25"). Time to clean all of that stuff off...
